


A Cooperative Learning Project


Notes to track various pests and pathogens and their treatment. This includes insects, disease and critters.
| Months | First Sighting | Pest/ Pathogen | Crop | Prevention /Treatment | Signs/ Comments |
|---|---|---|---|---|---|
| May | none | Leaf minor | Spinach & beets | row cover with blue sticky trap | successfully prevented it |
| June- | Cabbage worms | Cabbage | Hand removal (multiple passes each week) | Frass, holes in leaves | |
| July-Aug | 7/12 – brussels 7/12 – nasturtiums 7/12 – dino kale 8/9 – curly kale | Aphids | Brussels, nasturtiums, dinosaur kale, curly kale | Insecticidal soap; don’t use on fava beans, damages the blossoms | |
| July-Aug | 7/12 | Mediterranean fruit fly? | Peppers | Spray neem in evenings | Maggots eating fruit from the inside; tiny dots on outside of pepper |
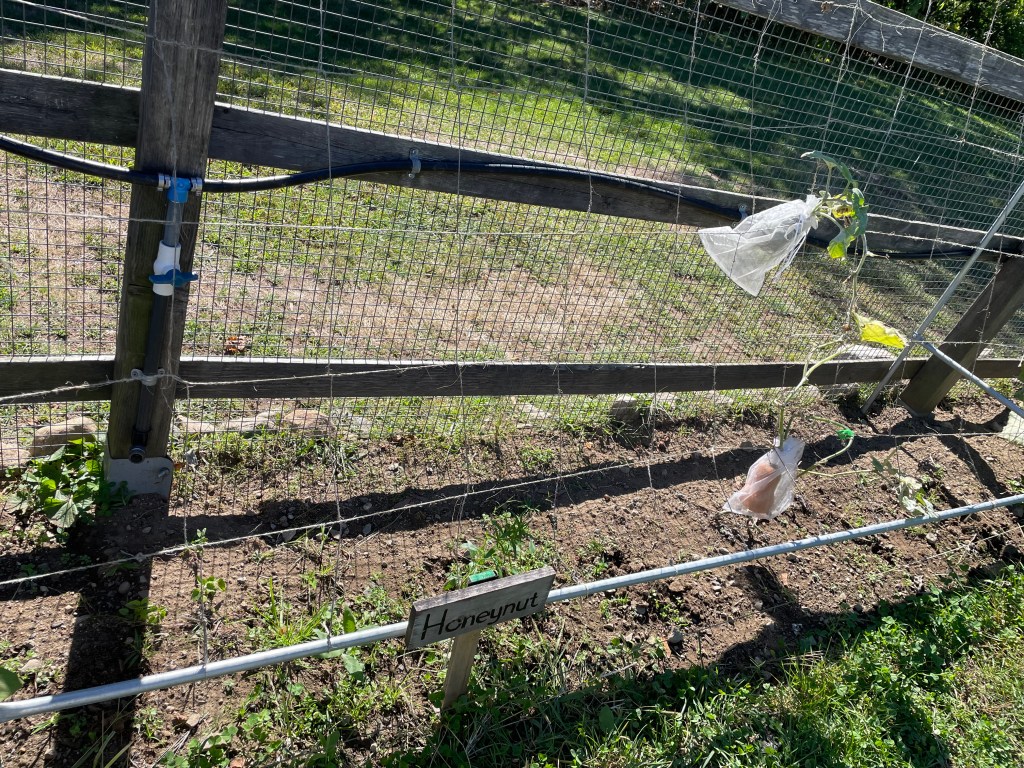
| Jul-Aug | 7/2 | Squash vine borer eggs | Summer squash, pumpkins, red kuri, mambo, cucumbers, honeynut | Remove eggs with packing tape | small red-ish brown spheres on stems and leaves |
| Jul-Aug | 7/19 – mambo,red kuri, dunja | Squash vine borer larvae | Red kuri, mambo, pumpkin, zucchini | Surgery (small cut in vine where frass is found, sharp tweezers to remove borer) | |
| July-Aug | 7/26 | Squash bug eggs | Winter squash (red kuri, mambo) | Hand remove eggs and bugs | clusters of amber spheres |
| Jul | 7/9 | Black spot | Tomatoes | Serenade fungicide | black spots on tomato leaves |
| Aug | 8/3 | Rodent? | tomato | half-eaten ripe tomato | cover developing fruit with fabric bags |
| Cucumber beetle | ? | ||||
| Aug-Sep | 8/10 | Powdery Mildew | Squashes, jerusalem artichokes, sunflower | Spray with Serenade | White coating on leaves |
| Jul-Aug | mid Jul? | Rust? | Bush Beans | none | Discolored leaves and loss of foliage; try fungicide next year? |
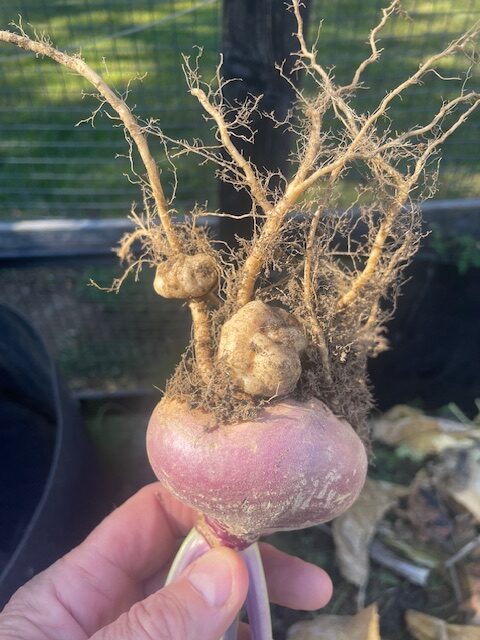
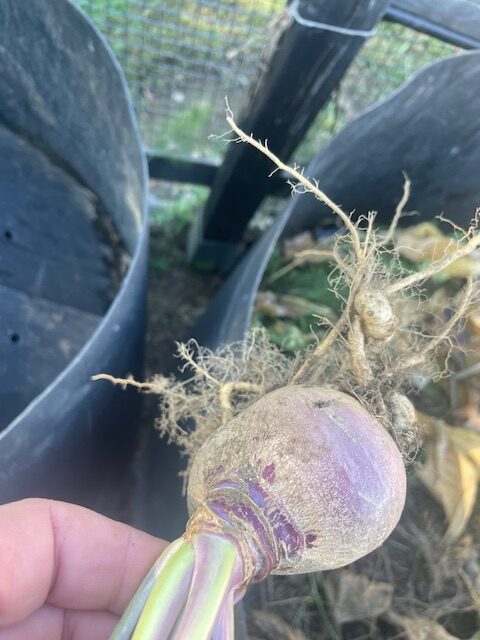
| Sep | 9/20 | club root | rutabaga | none | Large nodules on one rutabaga |


Copyright Robbins Farm Garden 2010-2025. All rights reserved. Site design by Carr-Jones, Inc.
Leave a Reply
You must be logged in to post a comment.